Category Archives: Second Grade

Activities for April 6th-April 12th

Hello everyone! This week for P.E. we have 3 separate activities, we have an active activity, a challenge activity, and a calming activity. The active and challenge activities could take as little as 10 minutes and can be extended to as long as you wish. Please spice these activities up with your own twists and creativity!

If you need more activities or would like to try other things please check back to previous posts, there are many resources and ideas! Anything I have shared this week can be indoors OR outdoors. I challenge you to get outside for at least an hour a day this week!

Active Activity of the Week

The first activity is a card game! Do not worry if you don’t have a deck of cards there is another way to play and those directions are below!

Each participant will pick 5 cards face down and place them on the floor in front of you. Now you will flip each card one by one! On each card you will see a suite, Heart, Diamond, Spade or Club. Each of these suites will have 3 activities you can choose from. There is also a number that coordinates with your card.

Coach Sadie flips her first card. The card is a 10 of spades. I will look at this chart and see my options!


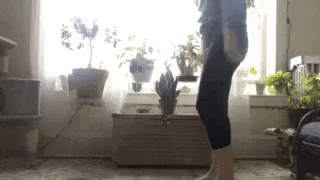
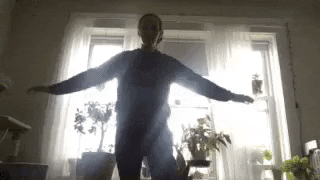
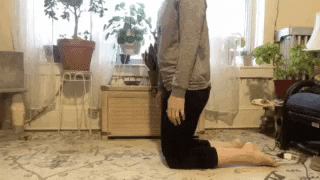
I will choose to do 10 seconds of either a Bridge, Squats, or Lunges. I choose Bridge. Now I perform that activity for 10 seconds, that’s counted as Mississippi’s !!!! Now if I am playing  with other people the next person will now go. You can all perform each other’s cards OR simply stick to the 5 that you draw. Notice that face cards have a significance too!

If you do not have a deck of cards, grab two bowls. Inside one bowl place 4 separate small papers with the drawings of a diamond, a heart, a spade, and a club. Inside the other bowl place separate pieces of paper with the following letters and numbers: A, K, Q, J, 2, 3, 4, 5, 6, 7, 8, 9, 10. Don’t forget to write JOKER on one of those! Now you can pull one paper from each bowl to create your own cards!  This game should take about 10 minutes, play for longer if you wish! This is a great way to re-energize throughout the day as well as use some of the energy you have!

If you are unsure what each of these exercises are- check out the new Exercise Library located at the top of the page!

Continue reading Activities for April 6th-April 12th

Friday’s Fitness Fun

Hello everyone! Today is Friday, and we are going to do a little alphabet movement!      

F is the 6th letter of the alphabet, we are going to do 6 forward lunges, make sure to switch legs every lunge!

R is the 18th letter of the alphabet, we are going to do 18 seconds of running in place

I is the 9th letter of the alphabet, we are going to do 9 Inchworms 

D is the 4th letter of the alphabet, we are going to do 4 donkey kicks! Be aware of personal space from people AND objects!

A is the first letter of the alphabet, we are going to do 1 arm circle, forwards and backwards 

Y is the 25th letter of the alphabet, we are going to hold a yoga pose for 25 seconds.  Let’s do Child’s pose! Sit with your bottom on  your legs, lean forward with your arms and torso. Place your forehead on the floor if you can. Count to 25, remember to take deep breaths!

Have a healthy, active weekend! Tune in Monday for next week’s activities!

Coach Sadie

Coach Sadie Learns to Tie Her Shoes FAST

Hello folks! Coach Sadie here with another update! During my time away from everyone I was thinking about useful skills that take little time to learn but need more time to practice.

While putting my shoes on this morning I realized how many times I help students tie their shoes every day and I wondered if you all were practicing at home. There are so many ways to learn how to tie your shoes and today I learned a new way! Usually  I use the bunny ear method, and have for most of my life! This method is great for beginners but takes more time than other methods.

So, while tying my bunny ears this morning I thought, maybe I will finally learn how to tie my shoes using the “adult method” also known as the “Circle Method.”  It turns out that one is efficient and cool but I wanted to learn an even faster knot. I had heard of the “Ian Knot” also known as the ‘Magic Fingers Knot’ and wondered what the buzz was all about. WELL this is the worlds fastest way to tie shoes and I FINALLY LEARNED IT! Now I challenge you all to learning at least one way to tie your shoes!

For my friends who have not learned how to tie their shoes yet, now is a great time to try to learn! Take the time to practice, don’t give up, and when I see you next show me the progress you have made!

Here’s a video of THREE different ways to tie your shoes!

And here is a poster you can print out and look at to remind you! This is the ‘Circle Method.’ I think this is easier than the ‘bunny ears’ that I learned.

Coach Sadie’s Heart-O-Meter

As we learn in P.E it is important to get our Heart Muscle pumping and working throughout the day! On average children’s heart rates are higher than adults while resting, and can easily jet up into what we call the ‘Danger Zone.’   All grades are learning different information about our hearts and how we can be attentive to what feels healthy and what feels too intense.

Our older students learned there is a way to measure our heart rates and how to exercise in the Target Heart Rate Zone (Green Zone).

I like math, I want a challenge, how do we measure this?!

Typically for adults we say take 220 and subtract your age. That number is your personal Maximum Heart Rate. Coach Sadie is 28, so her Maximum Heart Rate is 220-28=192. However our students will likely have a higher heart rate during activity. To play it safe I like to tell students to take 200 and subtract their age, this will keep their target number slightly lower. I think this is important because children are still developing and learning how to exercise- when exercise is too strenuous it isn’t healthy, nor is it a pleasant experience.

Ok, Coach Sadie I have my Maximum Heart Rate (Red Zone), now what?

NOW we look at percentages! If I want to work really hard I will try to get my heart to work at 75 percent of my maximum heart rate. To measure this, I will take the percentage I want to work and make it a decimal. Then I multiply that decimal by my Maximum Heart Rate, it looks like this-

__192 __ X _____.75_____=  _144

(Max Heart Rate   Times   Percentage of how I want to work equals my Target Heart Rate.)

This becomes my Target Heart Rate! (Green Zone)

How do I know if I am progressing or working?!

For this we need to measure our Resting Heart Rate- how many beats is our heart beating in one minute without doing any exercise?

Remember do not use your thumb to feel for a beat, it has its own! Do not put your hand on your chest because your heart muscle has different beat patterns and we want to focus on the one that goes to the rest of our body. 

We can find this on our wrist by tracing our pointer and middle finger down our thumb to our wrist, this is called our radial pulse. 

If you can’t find this one, you can place those two fingers on your jaw bone and travel down your neck to your carotid artery.

Don’t push too hard!

*Image from Firstaidforfree.com*

FOUND IT! Now what?!

Get a timer, OR a clock with a seconds hand, and watch it for 15 seconds.  Don’t forget the number you counted because there is MORE MATH!

______________         X         __4__          = _____________

Heartbeats      Times     Four           Beats Per Minute

This is how we find our resting heart rate and then how we find out if we made it to our target heart rate!!

The American Heart Association recommends that children ages      6-17 get 60 minutes of moderate to rigorous physical activity PER DAY. This can be achieved through aerobic activities like running, riding bikes, skateboarding, scootering, gymnastics, dance, or swimming. The American Heart Association also recommends children ages     6-17 to do weight bearing activities at least 3 times per week, and vigorous activity 3 times a week as well. Weight bearing activities for kids may include playing at a playground with monkey bars, climbing ladders, rock climbing, gymnastics,  martial arts etc. Vigorous activities may be activities they use for aerobic strengthening but may work harder usually indicated by sweating or getting hot.

Ages 3-5 are also included in American Heart Association with a recommended 3 hours of active play throughout the day.

Jump Rope Basics to Fancy Tricks

Players- Any!

Ages- Any!

Equipment- Jump Rope, if you do not have a jump rope you can use ANY type of rope or string. If the string is really lightweight you may want to braid together more string to make it a little bit heavy OR you can use beads to weight it down and make it look interesting! 

Set Up- Make sure you are in a place where a rope can swing around you- this is a great OUTDOOR activity or if you have an open garage space or a tall basement space. 

CHALLENGES!

*If you are new to jump roping take a deep breath- it will be frustrating at first!  When you start to get frustrated remember that it is hard BUT you are learning a new skill! If you can’t complete a skill at first TRY AGAIN! You will get there! Please wear shoes so you don’t hit your toes or ankles- OW!*

  • Step Over– Hold the rope with two hands, and have the rope behind your ankles, now WITHOUT JUMPING swing the rope over your head and let it hit your toes, now step over it, swing it over your head again! Step over! Keep doing this and make sure you switch feet! Step with your left foot too!
  • Forward Jump!– Start with the rope behind your ankles, swing the rope over your head, DO NOT JUMP UNTIL YOU HEAR THE ROPE HIT THE GROUND!!! If you find that you keep jumping before the rope touches the ground try with your eyes closed! Once you have jumped over the rope, pause, give yourself a high five, THEN keep swinging that rope over your head! Try to jump, and continue to 2 jumps in a row, 3 jumps, 4 jumps, 5 jumps…
  • Backward jump!– Start with the rope at your TOES, swing the rope over your head and behind you to your ankles, remember to jump when you hear the rope touch the ground because now you really can’t see it! Try to keep jumping with the rope behind you!
  • Criss Cross! – Here is a tough trick, start with the rope behind your ankles, start jumping forward, when you are ready to add some flare take your hands and criss cross your arms WIDE so that you give yourself space to jump over the rope! The common mistake is you get stuck in the rope while twirling it and crossing your hands, it should look like this!

*Image found from https://buyjumpropes.net/resources/jump-rope-tricks-and-tips/  Matt Hopkins 2014*


  • Criss Cross Feet!- This time instead of crossing the rope try to cross your legs when you land and then jump and uncross your legs and do it again!
  • Double Bounce!Try to jump two times before the rope goes under your feet. This means jump twice in one single rotation!
  • Skier! While you are swinging the rope over your head try to jump from side to side instead of in one place!
  • Bell!While jumping over the rope bring your body forwards and backwards like a bell swings as you jump!
  • Double Under! This trick can be a little dangerous to people around you- you will have to swing the rope a lot faster than you normally would. Try to swing the rope over your head and under your feet TWO times as you jump ONCE! I like to jump a little bit higher when I do this trick to get the rope under me two times. 

Side Swing! Bring the rope to the side of your body and swing it like a normal rotation, let the rope land in front of you, jump over it and  bring it to the other side!

*Image found from https://buyjumpropes.net/resources/jump-rope-tricks-and-tips/  Matt Hopkins 2014*


Here are some more options and pictures for those I have not left pictures with!

*Image above was discovered on Pinterest posted by Jeff Bruso original source unknown*


Bowling

Players Needed: 1-4

Ages: All

Equipment: 

*1-3 Dryer balls or other soft rolling objects, tennis balls work (if you play outside you can use anything that rolls!)

*3-10 plastic bottles or wooden blocks or 3-10 objects that can fall over without breaking

*Chalk if you are outside and want to draw lanes to roll the ball

Set Up: Place the items in a staggered pyramid about 10 feet away from your rolling line. If you have more blocks you can build a lane to keep the ball from leaving the playing space! 

Gameplay: Each person will have a turn to roll a ball 3 times during their play. Once they are done they will write down how many pins are still standing in the score corner (upper right of each box per round), on your next play you will add your new number to that to get the total so far and write it in the bigger box. This is a great way to practice tossing, and using math skills to keep a game tally. If you do not want to tally you can have just as much fun without!

If you knock all the pins down at once that is considered a STRIKE! Write a big X in the score corner, this counts for however many pins you play with! You get to add the first two rolls of your next turn to the score box, write the number in little handwriting next to the X to help keep track!

If you knock all the pins on your SECOND roll you get a SPARE! Write a / in the little box and then add the first roll of your next turn to one of the sides of the line. Here is a score sheet to practice your math! 

4 Square

Players needed: 1-4 (do you have a bigger than 4 household?! More can play too!)

Ages: All!

*Preschool Can play a modified version of bouncing the ball from square to square, try not to catch it! It’s like hot potato but bouncy!*

*Kindergarten, ignore the line rules- those are confusing, if the ball goes out of bounds that is considered an out, and if it hits any of the lines just continue play as normal. If playing with older siblings they can play your rules as well!*

Equipment needed: Chalk, and a ball that bounces, preferably kick ball sized but a tennis ball makes for a GREAT challenge!

Set Up:

 Rules/Game Play: Each of the 4 players will enter a numbered square 1, 2, 3, OR 4. 4 Is the server and is sometimes called the king/queen but we are playing a game of 4 Square not ruling a country so for our purposes; server is Number 4! Number 4 will place at least ONE foot behind the serving line which is the triangle in the corner. Notice how only square 4 has this. 4 Square MUST serve underhand, and to any player. The ball must land inside of the square and not touch any of the inside or outside lines. The ball MUST bounce before any player can strike it for play.  Once the ball has been served each player can move anywhere inside their square.

The goal of the game is to become the server. How do we do this?!

  • -If you hit a ball and it lands on any of the inside lines you are ‘out.’ and will retreat back to square 1. If you are playing with more than 4 people there will be a line for those people behind square 1 waiting to join. When you are ‘out’ you will have to join said line.
  • -If you hit a ball out of bounds you are out
  • -If you do not let a ball bounce into your square before hitting it you are ‘out’
  • -If you miss a ball and it bounces twice in your square you are ‘out’

These rules apply to other players as well so once the person above you is out, you would move into their spot and the same goes if you were in square 3 and missed a ball and got out you would switch back to square 1 or the line.  We always rotate up to the square above us when someone gets ‘out.’

Here’s a visual to see a game in action:

4 Square Game

Common Questions: 

  • What happens if the ball hits the OUTSIDE line?! 
    • A: The outside line is considered IN and you should try to hit it before it touches the ground again! 
  • Why is the INSIDE line considered an OUT or a bad play?!
    • A: Because you cannot tell which person’s square it would have hit! The line is shared and thus is considered out by the person that hit the ball last
  • How do I keep score?!
    • A: There isn’t an official way to keep score! The goal is to try to serve the ball and work your way up through each square! When and if you get out you should shake it off, and get excited to try to challenge yourself back at square 1! 
  • What if we disagree?!
    • This is a self referee’d game meaning we all have to be honest when we have faults- remember you will get right back into the game! The server can make a final decision but if the problem involves the server you must play one round of rock, paper, scissors to solve the problem. OR You can remember Coach Sadie’s PE Solution Station and use those strategies! 

Have a smaller household? 

3 players can play in the shape of a peace sign!


2 Players can play 1v1!

This is more of a rally (meaning hitting it back and forth) but it is a great challenge! Remember do not hit the inside line! 

1 Player?!

If you have an available wall that your family doesn’t mind a little chalk on, you can make a square on the ground and a square on the wall so that when you hit the ball it must stay in the boundaries of the square on the wall, if the ball bounces off the wall and misses your square you defeated a wall! Wild! 

Variations!

  • Play with your feet! Ball still has to bounce- for my soccer lovers out there this is a tough challenge! 
  • Use a racquet! Make sure your square is big enough so you won’t accidentally hit another player and use a smaller ball to bounce it to other squares. Remember the word I use when we need to be softer FINESSE! 
  • Create ‘mini games’ where the server can call out a game mid play. For example- PacMan- The server can call this after the serve, they then catch the ball and say PACMAN! Then everyone runs on the lines of the squares until tagged with the ball (you cannot throw the ball). When a person is tagged they must leave their square and go back to the first square. 

Movement Memory

Players Needed: 1-Infinite players

Equipment needed: 4-9 Pieces of colored paper OR 4-9 Pieces of paper that have a different shape, color,  letter or number on each page. Don’t have paper? Got paper plates? Napkins? Different colored T-shirts you can lay out? Rags?!

Set Up: Set up the pieces of paper in a grid like tic tac toe  


Multiplayer Game play: This game can be played with many players and all ages, remember social distancing please play with members of your household OR call a friend and play via phone or facetime! One player will go first and set a pattern using hopping and jumping locomotors (one foot OR two feet). They will set the first single hop/jump. The next person will then attempt to remember the previous hop/jump and add the sequence to their jump or hop. Play continues until one of the players forgets the pattern! This may look like this:

Challenger’s turn: Hopped with one foot on the oval

Coach Sadie’s turn: Hopped with one foot on the oval, and then set the next shape to be hopping on the Heart with one foot. 

Challenger’s turn: Hopped on one foot on the oval, hopped on the heart with one foot, and added the next shapes as a DOUBLE jump with one foot on the diamond and one foot on the triangle.

Coach Sadie’s turn: hopped with one foot on the oval, hopped with one foot on the heart, jumped onto the diamond and triangle THEN added a hope with one foot on the circle.


Single Player: Challenge yourself to create a sequence that the pages/items don’t touch, for example: Trapezoid, Heart, Oval, Circle, Parallelogram…   None of those pages touch in a row!

Challenge #2-  Create a sequence using anything but your feet! Remember your patches and points! (Points: Elbow, Knee, Hands, Shoulder,  and Head. Patches: Back, Stomach, Bottom, Leg, and Arm)

Challenge #3- Use a clock to see how fast you can hop a pattern of 3 sequences, then 5, 10, 20! How Fast can you touch all items/pages?!

Itchin’ to Dance?!

For students who like to dance using YouTube as a way to search ‘Just Dance’ gives you the opportunity to access some of the videos from the video game. Watching the bottom of the screen in the video shows you the dance choreography while watching. This is like karaoke but dancing! One of my personal favorites is Waka Waka This Time For Africa. For students without access to YouTube, turn on some music and create your own dance to your favorite songs! Come back to school and teach me some new choreography! 

Just Dance YouTube

Coach Sadie Challenges and Activity Suggestions

Being home far from friends and other family can have us down in the dumps. The weather isn’t helping with this situation either. I have some at home activities that require little to no equipment and can range from mindfulness to high energy activities. I will be sharing the next few weeks as we remain socially distancing and taking care of our bodies and minds! Stay tuned, and be well!