This week is Field Day (week)!!!!!!! I have created a virtual Field Day because NO CHILD should go a school year without Field Day!! That would be so disappointing. SO! All households are encouraged to get outside and play together as a unit. This was created for all ages and abilities! If you do not have equipment listed NO PROBLEM! Most objects will be able to be used universally and interchanged. Be creative with the things you have, do not go to the stores to buy equipment! If you have ANY issues or confusions PLEASE email me at Graham@Leverettschool.org and I will happily assist!
This week’s lesson is a special lesson! Typically during Field Day, our sixth grade students face off the teachers in a volleyball match. Though I have never experienced this at LES I thought it was important to give our 6th graders a lesson dedicated to them as this moment we would be cheering for our peers.
SO Let’s talk about Volleyball! Did you know that Volleyball was originally called Mintonette? Did you know it was invented in Springfield, Massachusetts as a hopeful alternative to basketball; to encourage people who were older to continue to exercise and play in an activity that was no contact? DID YOU FURTHER KNOW that the inventor of Volleyball AND Basketball were friends and they went to the same high school -Mt. Hermon Prepatory School in Northfield Massachusetts?! How amazing is that! SO much local history!
Because we will be learning volleyball in quarantine, it will be difficult to learn the physical game, so I will give you the basics and ways to practice at home!
The BASIC Rules
-6 people on each side of the net, lined up in two rows of 3 people
-3 Touches on your side ONLY- ball must be hit to other side by 3rd touch
-A person cannot hit the ball two times in a row
-If the ball touches the ground on the other teams side, inside the boundary it is a point for the hitting team.
-If the ball hits on the line it is considered IN
-You cannot catch or throw the ball
-You CAN use any body part… however I am not teaching that in this lesson
-Volleyball net height is 7 foot, 4 and 1/8 inches! Please use a 4-6ft net height to have best results !
Let’s get to it!
The first thing we need to learn about volleyball is that we use only our arms and hands to strike the ball. The main types of touches are the underhand serve, overhand serve, bump, set, and spike.
We have learned about underhand striking and overhand striking with paddles, so now let’s learn with hands!
Underhand Serve
Wait, what is a serve? A serve is the way in which we send the ball to the other team and begin the game. These will be important when we learn how to play with a net as the ball needs to go OVER the net! If the ball hits the net but goes to the other side it is considered playable. For this lesson’s purposes if you have a way to mark a line on the ground or use a clothesline or hang a string in your yard just above your head, and can hang a towel over it you’ll be able to visually see where your target is.
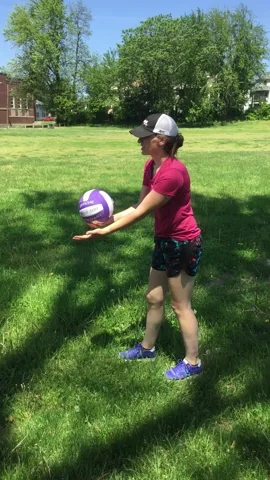
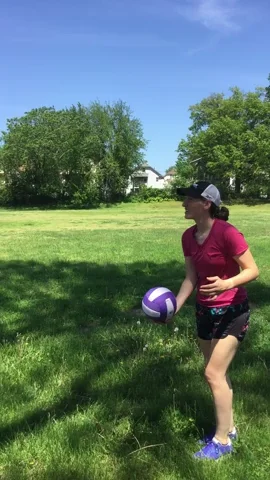
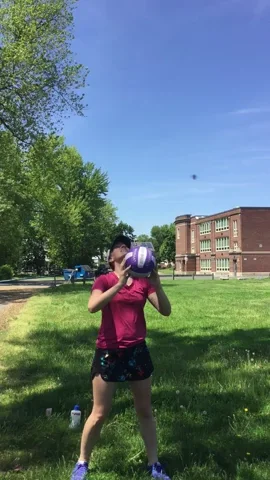
The serve itself requires you to hold the ball with your non-htting hand. You will hold it between your waist and shoulders. Your feet will be set to hitting with your dominant hand- for my my dominant hand is my left hand, I will step with my right foot forward and right foot back- it is the opposite for righty’s. You will now swing with your dominant hand and aim to hit the ball in the CENTER. Use an open hand for precision and a closed fist for power. I like the open hand option. As you step and wind up to hit the ball, make sure you drop your opposite hand so the ball is free to be hit. Once you hit the ball it should now go over the net! You should stand about 10 feet away from your target JUST TO PRACTICE. Eventually we will work our way to the end line. To practice this you will start by dropping the ball to yourself, and striking it over your target. If you have someone to play with have them stand on the opposite side to retrieve, and they can then serve it back to you! If you need to use a wall, you can practice serving to the wall, soon we will be able to learn about other returns to keep you going at the wall!
Overhand Serve
This serve is more common and is slightly tricky. For this serve you will have the same footing and hold the ball with the same hand. You will ONLY hit with an open hand for this, like you are high fiving the ball! You will now toss the ball UP above your head slightly, and in line with your striking hand. You will need to be gentle because if the ball spins, it will go in the direction that it is spinning and you will lose control. You will now try to hit the ball over the net by tossing the ball up to your striking hand, and stepping OR jumping and hitting the ball over hand. To get comfortable with the toss, practice at least 10 times tossing to yourself getting the ball about 2 feet over your head, and having it land right in front of the hand you would hit with. This is the most important part, a toss too far away you will miss or the ball will go to the ground because you will hit too late, a toss too high and fast will cause you to hit the ball too soon making it go to the sky! This is an important one to practice as it is similar to the spike which is a difficult hit we will learn about soon! Practice this with someone OR a wall! Practice 10 tosses to yourself and then 5-10 minutes of serves.
BUMP
The bump is really important for receiving the ball, passing the ball as well as setting the ball if you don’t have the option to hand set- we will talk about shortly! A bump is when we place our fingers into our other hand and place our thumbs next to each other. We do not make a fist with our two hands! We use our forearms to strike the ball. The best way to practice this is to use your buddy to throw the ball in your direction. You will want to get lower than the ball, and set yourself up to receive the ball in the middle of your forearms. Here you will use a light to medium force to hit the ball. You are either aiming to pass to a team mate (using a lighter force because they are close to you) or just bumping it over the net to get it out of your side. To practice this- find your buddy and have them toss the ball to you, try to get below the ball, and return it to them 10 times.
Setting
This is important because it gets the ball ready to be hit over the net- this is another type of pass. You will take your hands and place them over your head and bend your elbows, the ball will be coming toward you at a high level above your head. You want your elbows out, and your hands in position to flick away from each other. You want every finger to be in contact with the ball. When the ball comes to you, your hands will catch it like it is catching an egg or water balloon, lightly so you don’t break them, and then flicking up with your fingers and hands flicking away, this will lead the ball back up but without spins or speed. This makes it easier for the next person to spike! Now practice this by doing 10 short hand sets to yourself, keep the ball going don’t let it fall to the ground, then do 10 taller sets without the ball dropping. It is hard to time your body positioning below the ball try each one and find which way you like better! With your buddy see if they can bump you the ball, then you can set it! Now see if you can bump to your buddy and they can set it! The next hit is the spike ! Everyone loves a good spike…
Spike
Spiking is really important but a tough skill to learn! This skill requires you to jump pretty high, and time your strike with your hand so that you hit the ball over the net. To spike the ball you will need momentum or a leaping start, you will only take 3-4 leaps towards the net, and jump up as the ball is being set to you, wind up your arm over and behind your head, hit it with the center of your hand, in a downward motion over the net. For this to work well for us you will not want to use a regulation volleyball net, you will want to have your net at about 4-5ft high depending on how tall you are to get these skills down.
Spikeball
Another GREAT summer game and one of my favorite sports is Spikeball. This is something I am really excited to introduce to LES hopefully next year! If you have a Spikeball net at home, AWESOME! Anyone can play and it’s hours of endless fun. If you do NOT have a net but have a hula hoop and a playground ball YOU CAN STILL PLAY! If you don’t have a hula hoop you can use a rope to make a circle using the rope as the rim or just draw a 3ft circle on the ground with chalk. Here’s some videos on how to play!
*Note for PK-2 these skills ARE advanced. Slow down each skill and make everything smaller. Use a beach ball, or balloon, work on hitting it to yourself and keeping control. Try each skill focusing on the underhand, set, and bump as the focus points. *
6th Grade Shout Out!
To our sixth graders I am so sad I didn’t get to coach you all in the Volleyball game this year. I am confident you would have been an incredible team and would have given teachers a tough match! I wish you all the best in your bright futures heading to middle school, I can’t wait for you all to visit and I hope you have an incredible summer!
We are going to have incredible weather this week. PLEASE PLEASE do your best to get outside, wear sunscreen, hydrate, and take in all of that Vitamin D from the sun!
This week I would like to talk about warm up’s and stretching. Before every class we always do an active activity that has few instructions and we move our bodies from 5-6 minutes before we begin our lesson of the day. Have you noticed how we never do ‘static’ stretching before? If you play sports or do activities that require movement usually your coach will have you sit in a circle and count to 10 while holding positions. Why is that?
WELL! Let’s think, if we just came to PE after sitting for a long time our bodies are tired, and probably a little sore. I know my back and bottom has been sore sitting at my desk chair at home during this pandemic! If we were to then come to PE and stretch our muscles, they wouldn’t be happy if we were sitting still. Our bodies need to move to get blood flowing to bring oxygen to all of our body. When we move our body dynamically (through running, hopping, skipping, jumping and galloping) we are warming up our bodies and muscles in a way that brings blood all over our body faster. Static stretching (still stretching) is a way for us to increase our flexibility. Dynamic stretching (movement) is a way for us to increase our mobility. Think about the tin man greasing his joints, it’s almost the same. At the end of class, when we have time; I like us to slow down our heart rates, and bring our bodies back to being calm by doing static (still) stretching. I like to wait until after active activity because to help increase our flexibility it makes sense to make sure our bodies are warm before stretching our muscles.
This week I would like you to create your own warm up sequence. We have talked about sequences in our fitness and our gymnastics units. A sequence is an order of movements. I would like you to make a sequence of warm up exercises that help your legs, your core, and your arms! This should take about 10-15 minutes to create. Once you have created your sequence I would like you to try to use your sequence before an active activity. I would also like you to try an activity activity WITHOUT your sequence beforehand. Do you feel a difference? Is your body sore or tight? Is your brain not working fast to connect with your body? Do you feel clumsy?
Here is the link to the exercise library, if you have exercises that aren’t listed here please use those as well!
This week I would like us to work with ‘striking implements.’ You might be thinking “uh Coach Sadie what on Earth are you talking about?!” I’m talking about ping pong paddles, tennis racquets, pickleball paddles, racquet ball paddle, badminton racquets, pro kadima paddle, even using frisbee as paddles (what?!). ‘What if I do not have an implement to strike with?’ You can use your hands! I will get into that part a little later but fear not!
Striking is the act of using an object (typically a racquet or paddle) to hit (manipulate) another object that (ball, birdie, balloon). This task can be difficult because you cross planes with your body meaning you step with your opposite foot, then swing or strike with the opposite upper body, and follow through across your stepped foot. Sometimes we do the opposite of that and cross our body while stepping with the same foot too! This is a lot to remember!! This is really difficult because our bodies need to coordinate a whole lot of things to be able to do this.
THE GRIP
Let’s talk quickly about the grip. We want to take our dominant hand (the hand we feel most comfortable with, sometimes we use to write with) and place the object in our hand and hold it like we are holding a magic wand. We are not holding it like a pencil, or a marker. Our fingers should wrap around the object and our thumb will rest on the front or side of the handle.
The grips and stances for our two strokes look like this! The differences are where we hold our paddle, aside our body or across our body. Which one looks like we are reaching across our body?
Forehand Backhand
Level 1
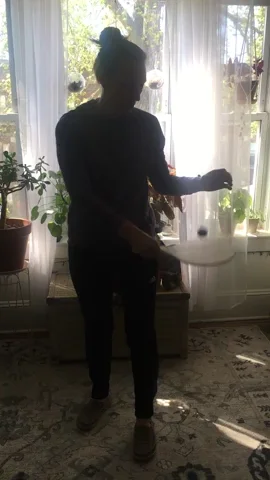
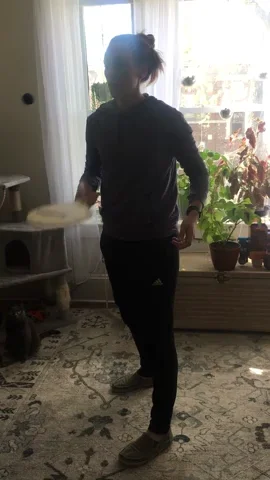
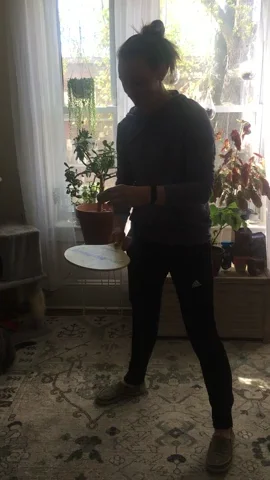
The bump up! This is when we take a racquet or paddle and a ball or balloon and try to bounce the ball on the paddle or racquet. This is kind of like juggling but with an object instead of your hands. All I want you to focus on is tapping the ball using what is called your forehand.
Your forehand is the side of your hand where your palm is, think about high fives with your forehand! If you were to use your back hand it would look silly and feel weird. SO we will practice bumping holding the paddle with our high fiving forehand facing up. Try to bump it 3 times in a row, then 5, then 10, then 20! See how many bumps you can do.
Now we are going to bump backwards with out backhand. Our back hand is when we flip our hand over so that we are looking at the back of our hand as we bump the ball or balloon on our paddle.
Which grip did we have more control with? Our forehand or backhand? How did we keep the ball in control? Did we hit the ball really hard? Did we hit the ball so soft it barely bounced? Did we keep the paddle really close to our body? Was the paddle so far away I had to move my whole body to follow the ball?
Try to tap the ball behind your back or between your legs! I tried but my house is a little too small for my movement. I will have to practice outside!
Level II
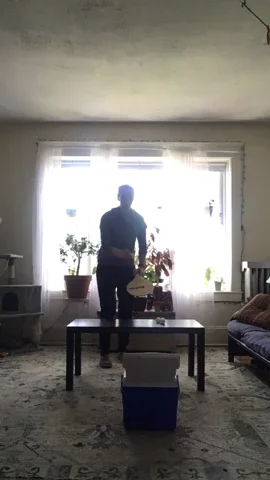
Now once you feel more comfortable with this try to strike the object over a still object at waist level. Once you get this down try to strike the object so it goes over a still object and into a boundary! For example the still object is the imaginary net you are aiming to hit over and now you want it to land in a certain area. Once you have practiced this with your forehand, try to use your backhand! If you can try to hit the ball to a wall/rebounder and have it rebound back to you. Let it bounce once before you return (hit it back).
I would make the table further and the cooler further but I live in a small house! Work with what you’ve got! This is way better played outside!
Level III
If you are really comfortable with all of the above, NOW you are going to use the overhand and underhand ideas we have talked about this year! When we did bump ups thats using the underhand method, our hand is under the ball and comes from under our waist. The overhand we will toss the ball over our head and our paddle and racquet will follow overhead making an overhand strike!
Here is a GIF of Venus and Serena William’s overhand serves! Incredible!
I don’t have a racquet or paddle….
That’s okay! As silly as it sounds you can use a frisbee as a hand paddle by holding it at the edge placing your thumb on top and your fingers underneath the edge. You can strike a ball with this still! If you have a plastic plate, tupperware lid, or paper plate and balloon all of these work as well! The final alternative is to use your hand! Volleyball is a GREAT example of a time you would use your hands to strike objects. We will talk about volleyball more next week and how to strike specifically for that. If you only have your hand options, keep your hands flat meaning not a fist, you can still strike smaller objects like a tennis ball, raquet ball, ping pong ball, balloon etc.
I hope you all get out and play! Continue to work on previous activities and challenges as practice will help you improve comfort and skill!
The final week’s results are in! This past week participants completed 1,655 Minutes of active time! That is a total of 27.5 hours! That’s almost as much time as we spend in school a week!
The grand total of active minutes is 7,780 minutes in three weeks! That is equal to 129.6 hours! Wow!
Though this three week challenge is coming to an end, we encourage you to keep moving to help your body and mind stay healthy during these times. We are so proud of all the participants and can’t wait to plan for a school wide challenge again next year!
This week I wanted to try a game of BINGO with you all! I have placed 24 different activities on a bingo board below. Every time you participate in an activity for AT LEAST 10 minutes you can cross the box off! If you get 5 in a row you win a virtual high five! Five in a row can be diagonal, horizontal, or vertical lines! This is a great way to try new things and to switch up some of the routines we have created. Even if you do not know how to do an activity listed, I want you to try to practice the basics of it!
*Please note: for the climbing and Parkour/free running activities; please make safe choices. If you do not have a play structure, or rock wall, or small tree to climb you should try a different activity. Parkour and free running are a combination of slightly different movements of running, climbing and jumping from one point to another as quickly as possible. Please do not do extreme hardcore parkour- let’s be safe and creative- make your own course! *
CHALLENGE OF THE WEEK
It has been so hard for me to motivate myself to try new things recently. Motivation is the drive or want to do something. We sometimes feel motivated to play hard in games to win, or to beat our last score, or to achieve a goal we made. When we are stuck in quarantine doing the same things over and over it can be really hard to feel motivated. You aren’t alone! This week I would like to give you a few options to try at home to improve in areas that we touched upon this year in class.
Dribbling a ball with your hands
Level 1
Level 2
Dribbling a ball with your feet
Level 1
Level 2:
Level 3
See how many juggles you can get in a row! I’ll post my best score from this week in next week’s blog post! Stay tuned for some upcoming posts about striking using implements including bats, racquets and paddles!